DESCRIPTION
For this proof, I implemented a Git repository for a recent coding project. The main goal was to establish a robust, professional workflow that's standard in the industry. This means my entire codebase—including all my source files, configurations, and assets—is tracked under version control. I'm using features like committing, branching, and pushing to a remote platform (like GitHub or GitLab) to manage changes and maintain a complete history of the project.
GOAL
My goal was to ensure code organization and safety. I needed a versatile way to keep my files clean and structured, and, most importantly, have a reliable backup system. A secondary but crucial goal was to enable team access and peer review. I wanted to make it easy for my teammates or instructors to access, view, and review my code, which is a non-negotiable step in any professional development environment.
REFLECTION
Honestly, having a Git repository is a massive lifesaver. Before I really committed to using version control , losing files or messing up a major feature felt like a constant threat. Now, knowing that I can revert to any previous stable version or simply clone the entire repository back into my code editor if I lose my local copy is a huge boost to my confidence. It's not just about backing up; it's about the versatility and the professional workflow it enables. It instantly makes my product feel more mature and ready for collaboration.
WHY PROOF BELONGS
Making this project plan really helped me and my team stay organized and focused. It gave us a clear structure to follow and made communication easier. Even though the project isn’t fully finished yet, the plan has kept us aligned and helped us meet most of our goals on time.
ACTION
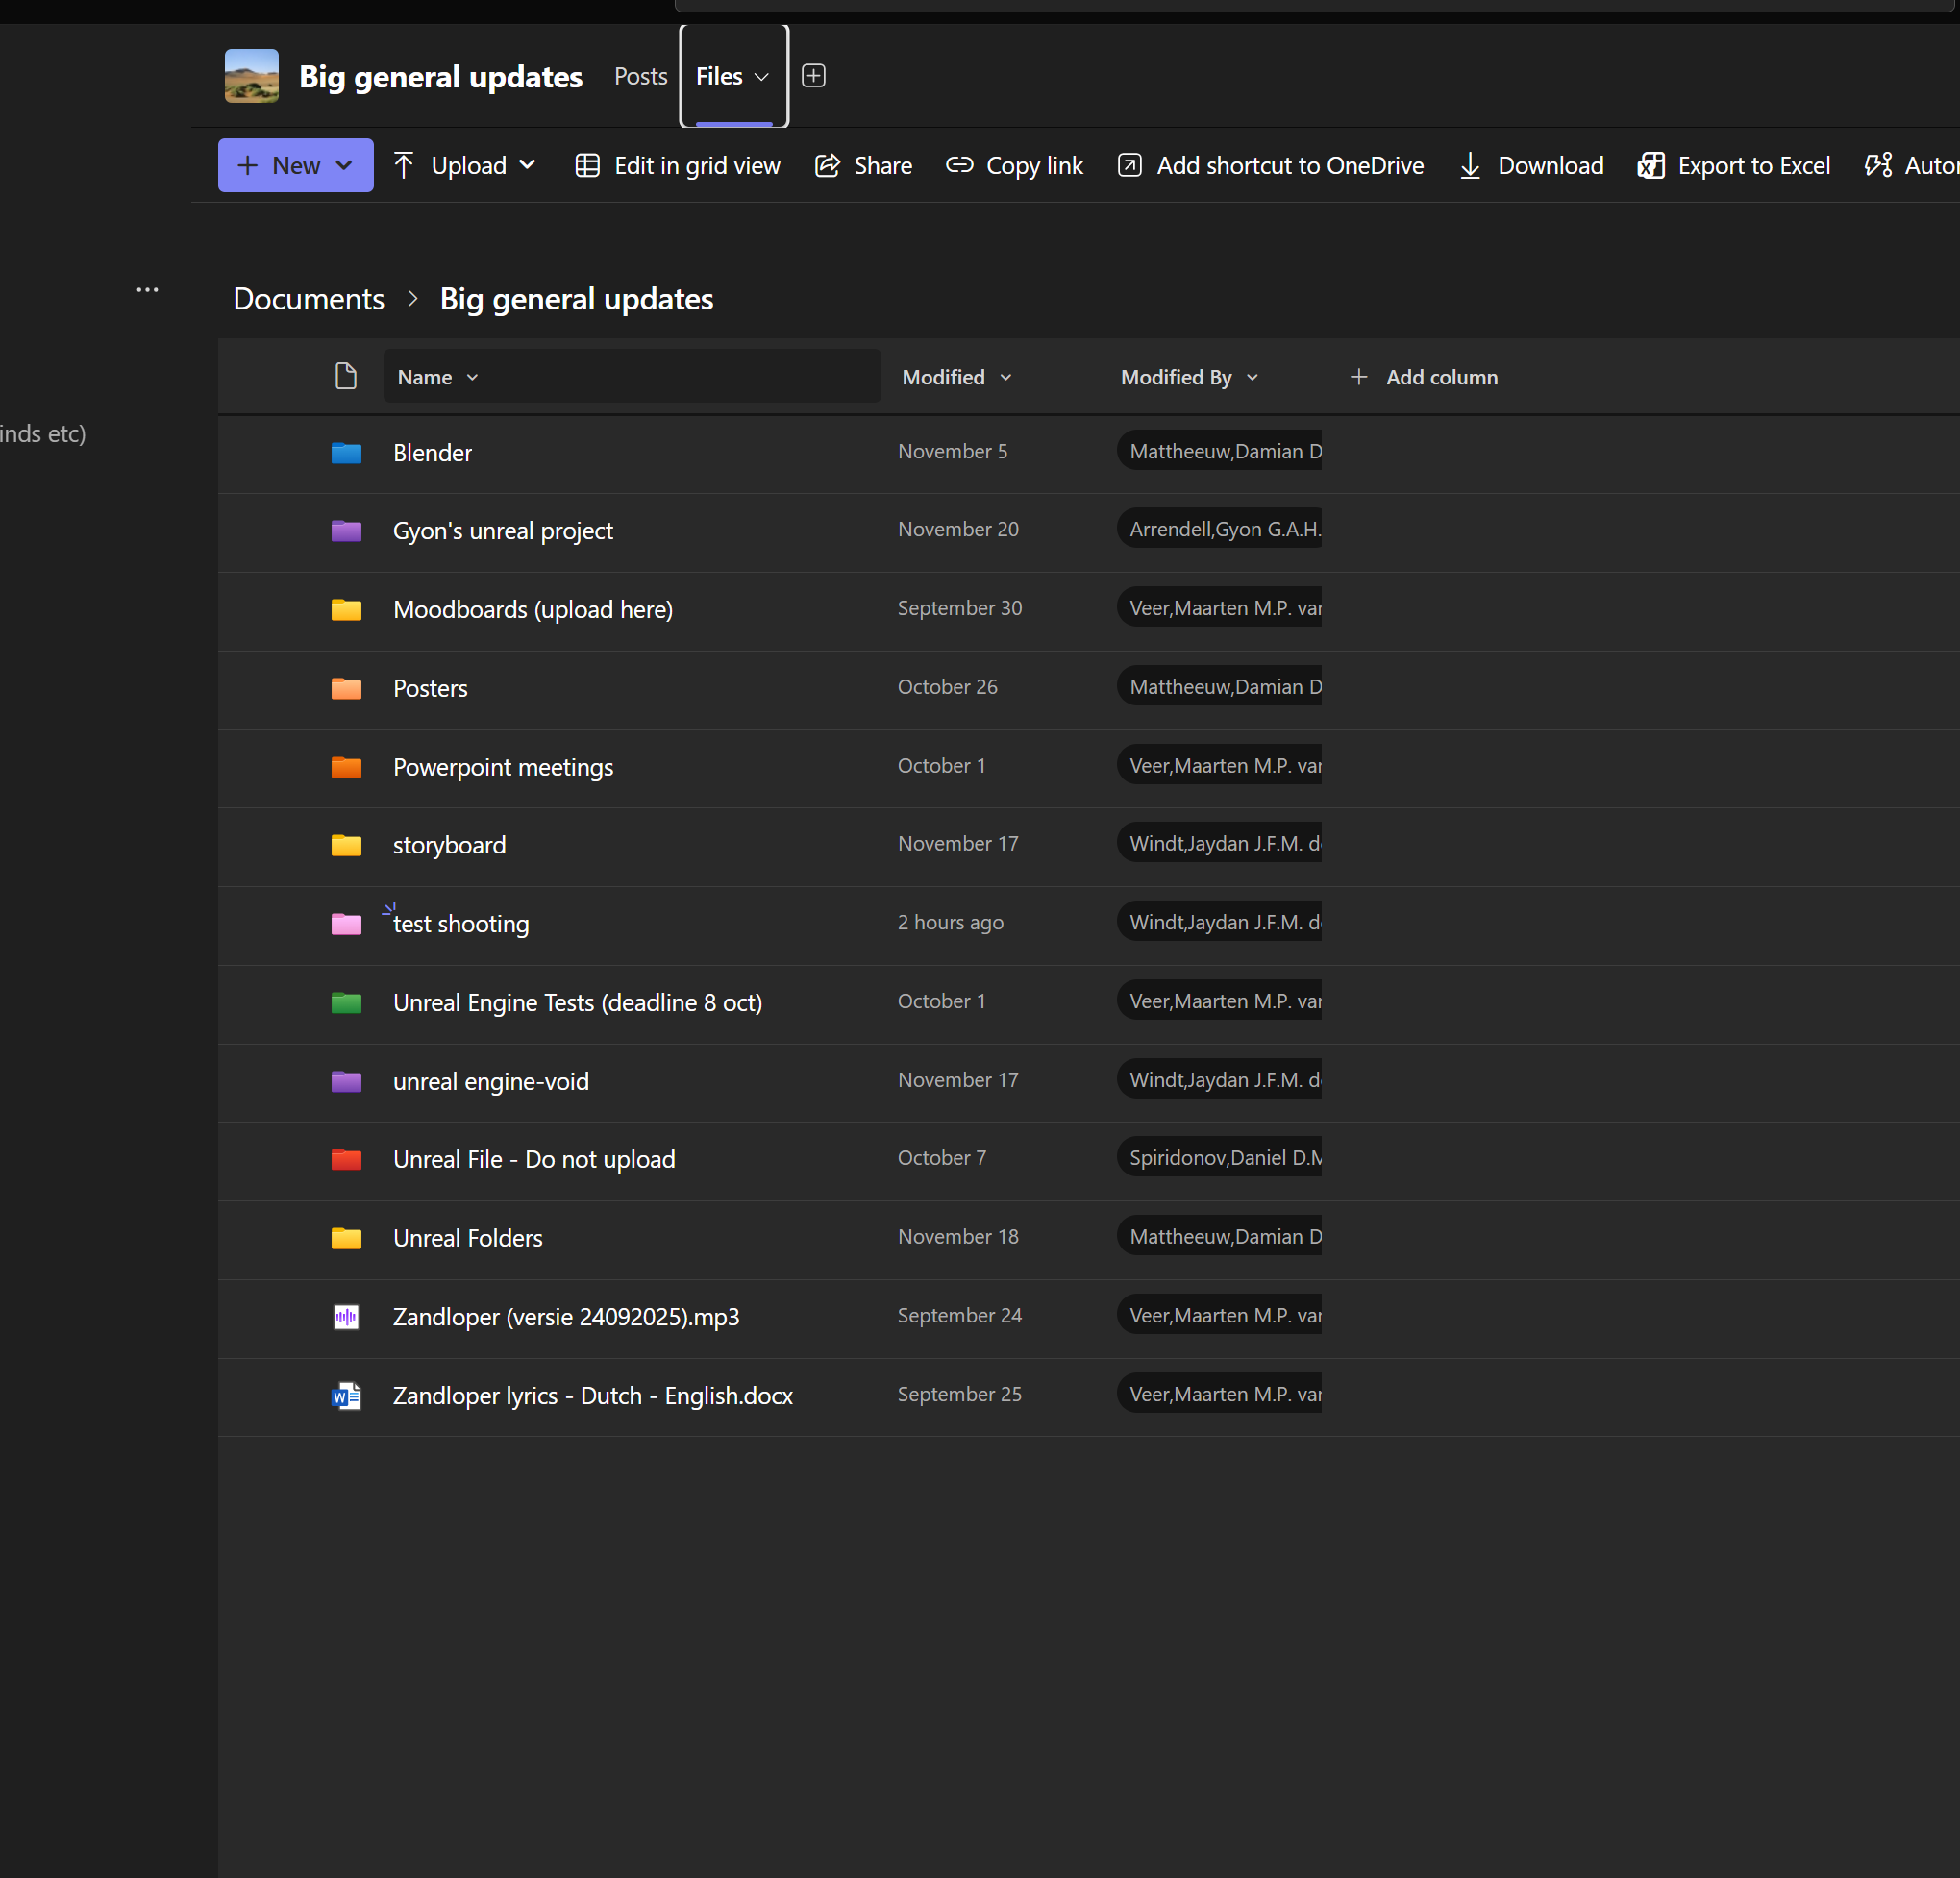
What I did was make Git my non-negotiable standard. For this project, I created the repository first, and then every single piece of code I wrote went through the commit process. I used different, clearly named branches for new features I was experimenting with, so if I messed up, I didn't break the main code for anyone else. Once a feature was done, I pushed it up and created a Pull Request (PR) so my team could check it out and leave comments. This whole system—the branching, the committing, the PRs—is how I now manage my code, which is exactly how it's done in the real world. It makes it easy for anyone to access my code, review it, and download it if they need to. If you wish to see the git repository please click here.
DESCRIPTION
For this proof, I created a project plan for our music video project. The plan helped define what we wanted to do, how we were going to do it, and the best way to achieve it.s.
GOAL
My goal was to give the team a clear and structured plan so everyone knew their roles, deadlines, and responsibilities. I wanted to make sure we stayed organized and on track throughout the project.
REFLECTION
Making this project plan really helped me and my team stay organized and focused. It gave us a clear structure to follow and made communication easier. Even though the project isn’t fully finished yet, the plan has kept us aligned and helped us meet most of our goals on time.
WHY PROOF BELONGS
This proof fits Learning Outcome 2 because it shows that I can create professional documentation to guide a project. It demonstrates planning, organization, and communication key transferable production skills that are important in both personal and team projects.
ACTION
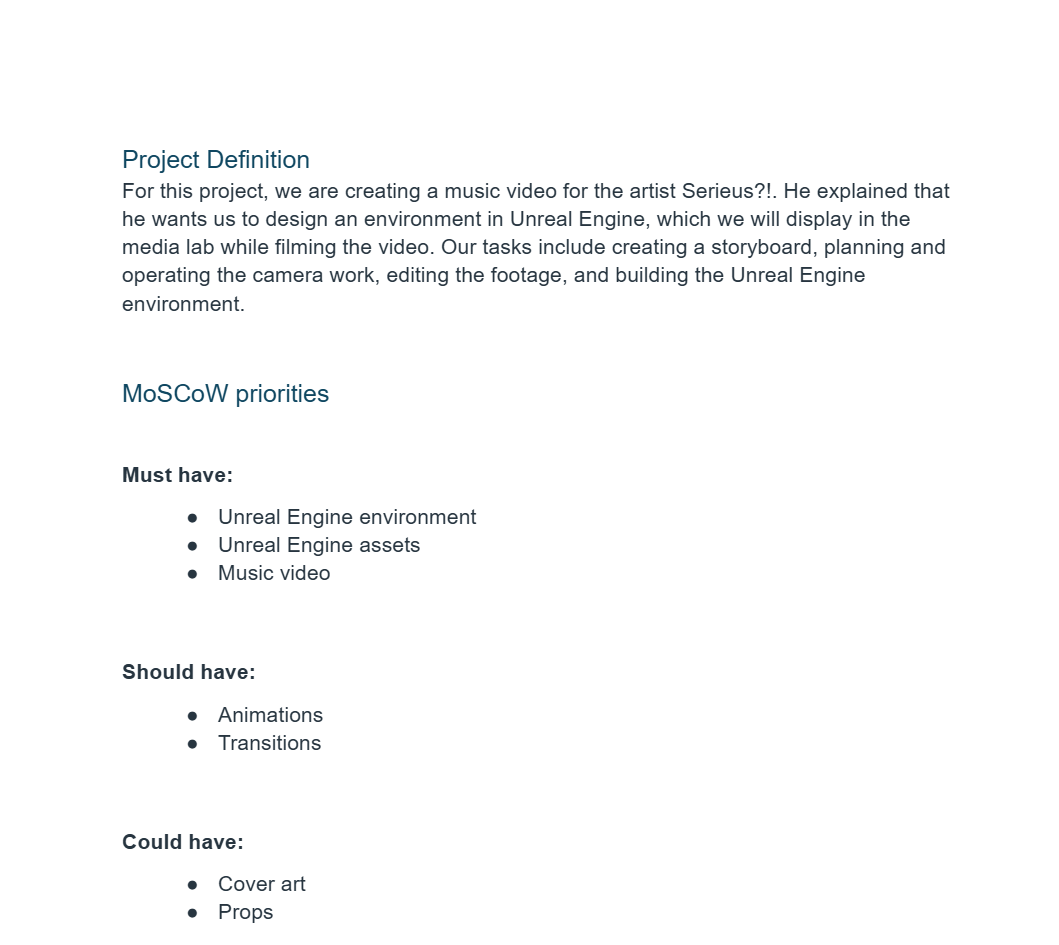
I worked on the full project plan, which included the project definition, team roles, planning schedule, and task lists. I also created a MoSCoW list (Must-Have, Should-Have, Could-Have, Won’t-Have) to prioritize what features were most important. For example, the must-haves included a new Unreal Engine environment and the music video itself, while the should-haves were animations and transitions. I also made a risk assessment that listed possible problems that could affect the project and how we could reduce those risks.
.png)

DESCRIPTION
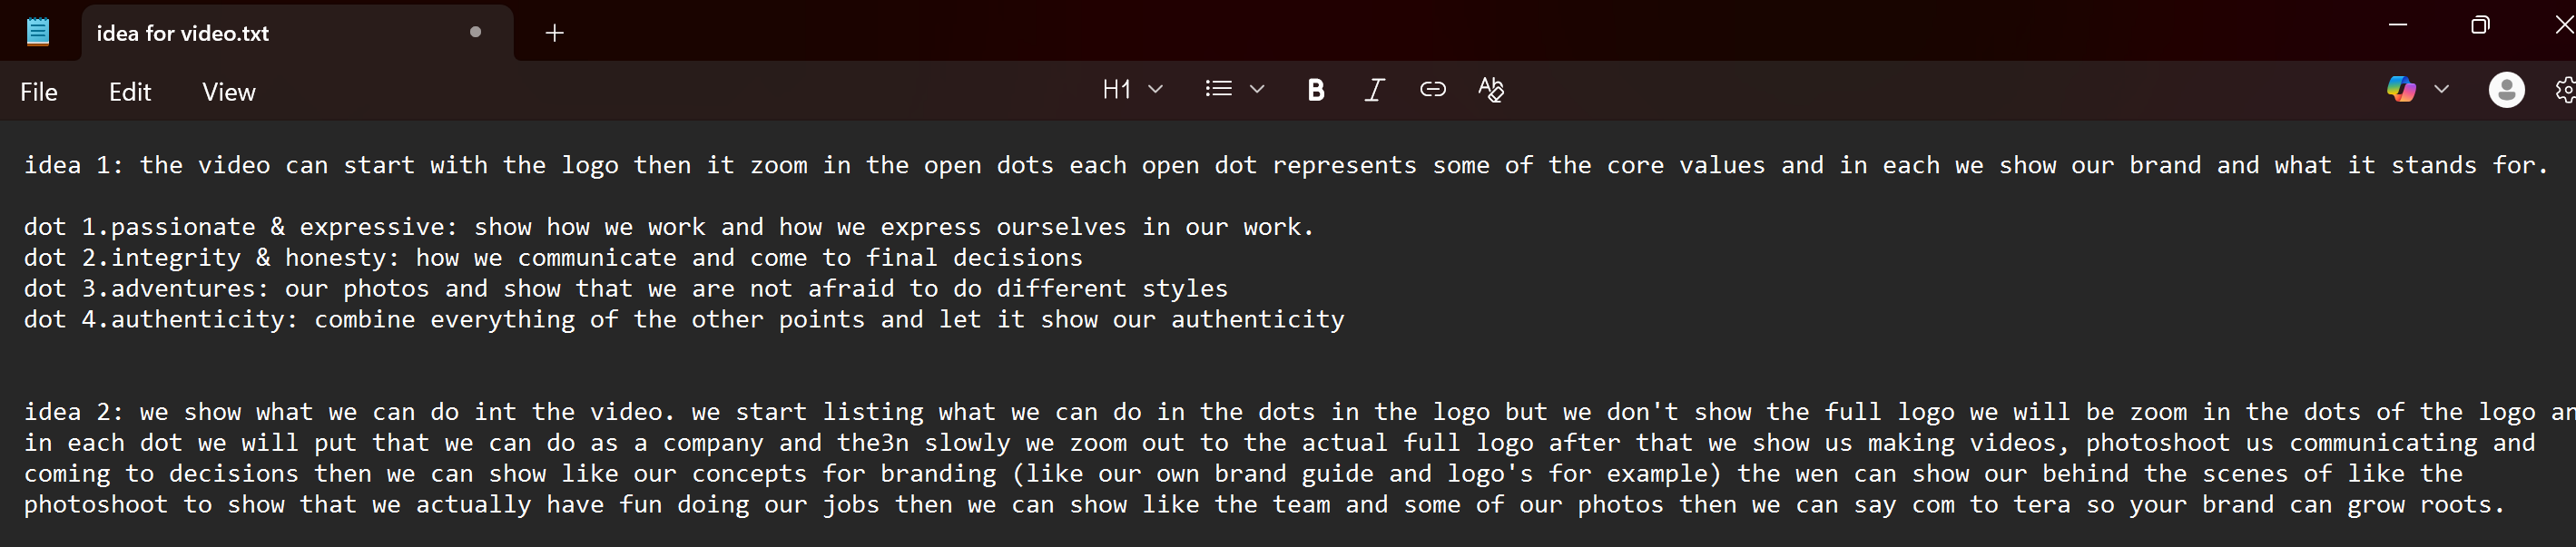
For this project, I needed to make a storyboard for a promotional video. What I did was document a couple of initial ideas in my notepad. The first idea was to start the video with the logo, then segue into a series o f open doors, where each door represents one of our brand's core values. The second idea was more abstract, focusing on the "dream" and showing a list of what we can do, all while zooming in on the dots of the logo without ever showing the full logo.
GOAL
The main goal of this early documentation was to generate high-quality, viable options that effectively promote our brand and secure the client. More specifically, I wanted to provide multiple, distinct design recommendations to the stakeholders. This process allows them to choose the concept that best aligns with their vision, ensuring our team is building the right product from the start and preventing costly rework later.
REFLECTION
I'm glad I took the time to write out those two different approaches before settling on one. The first idea, starting with the full logo and transitioning to open doors representing core values, was very direct. The second idea—focusing on the "dream" and zooming into the logo's internal "dots" to represent what we do—felt more abstract and artistic. When I compared them, I realized they targeted different emotional responses. This initial documentation helped me communicate the pros and cons of each concept clearly, rather than just describing one idea. It showed I considered the design problem from multiple angles, which is really professional.
WHY PROOF BELONGS
This proof fits Learning Outcome 2 because This proof demonstrates the process of "creating professional documentation" by sketching out design ideas in a notepad before finalizing the storyboard. It also directly relates to "communicating design decisions" by outlining distinct concepts that can be presented to relevant stakeholders (the client or production team) for selection and feedback.
ACTION
To fully utilize these documented concepts and move into production, the next step I took was to translate both initial notepad ideas into rough digital wireframe storyboards. I then scheduled a meeting with the client and my marketing lead specifically to formally present and communicate these two design recommendations.
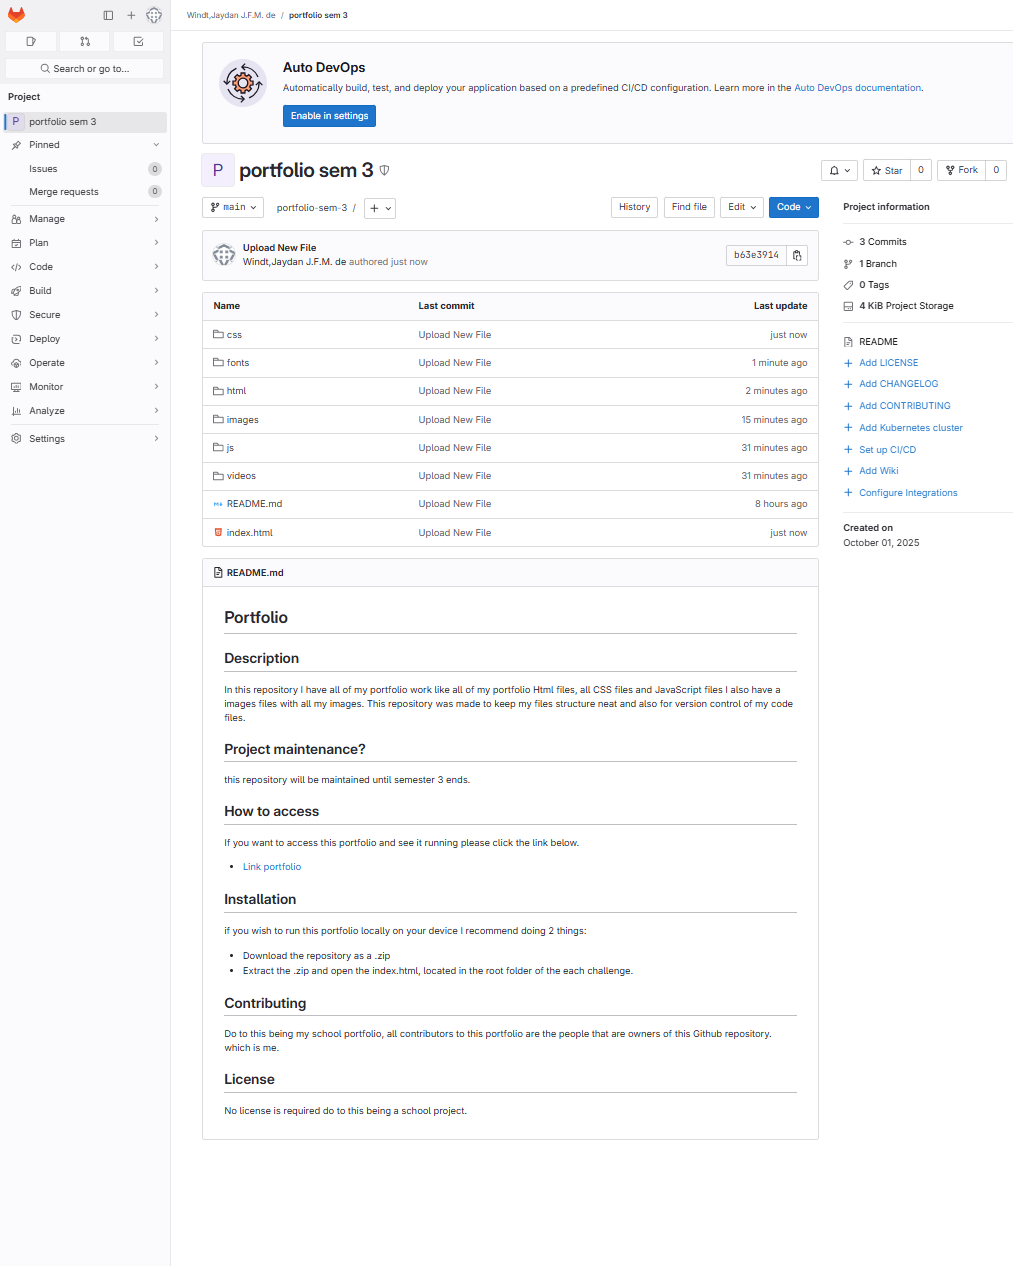
DESCRIPTION
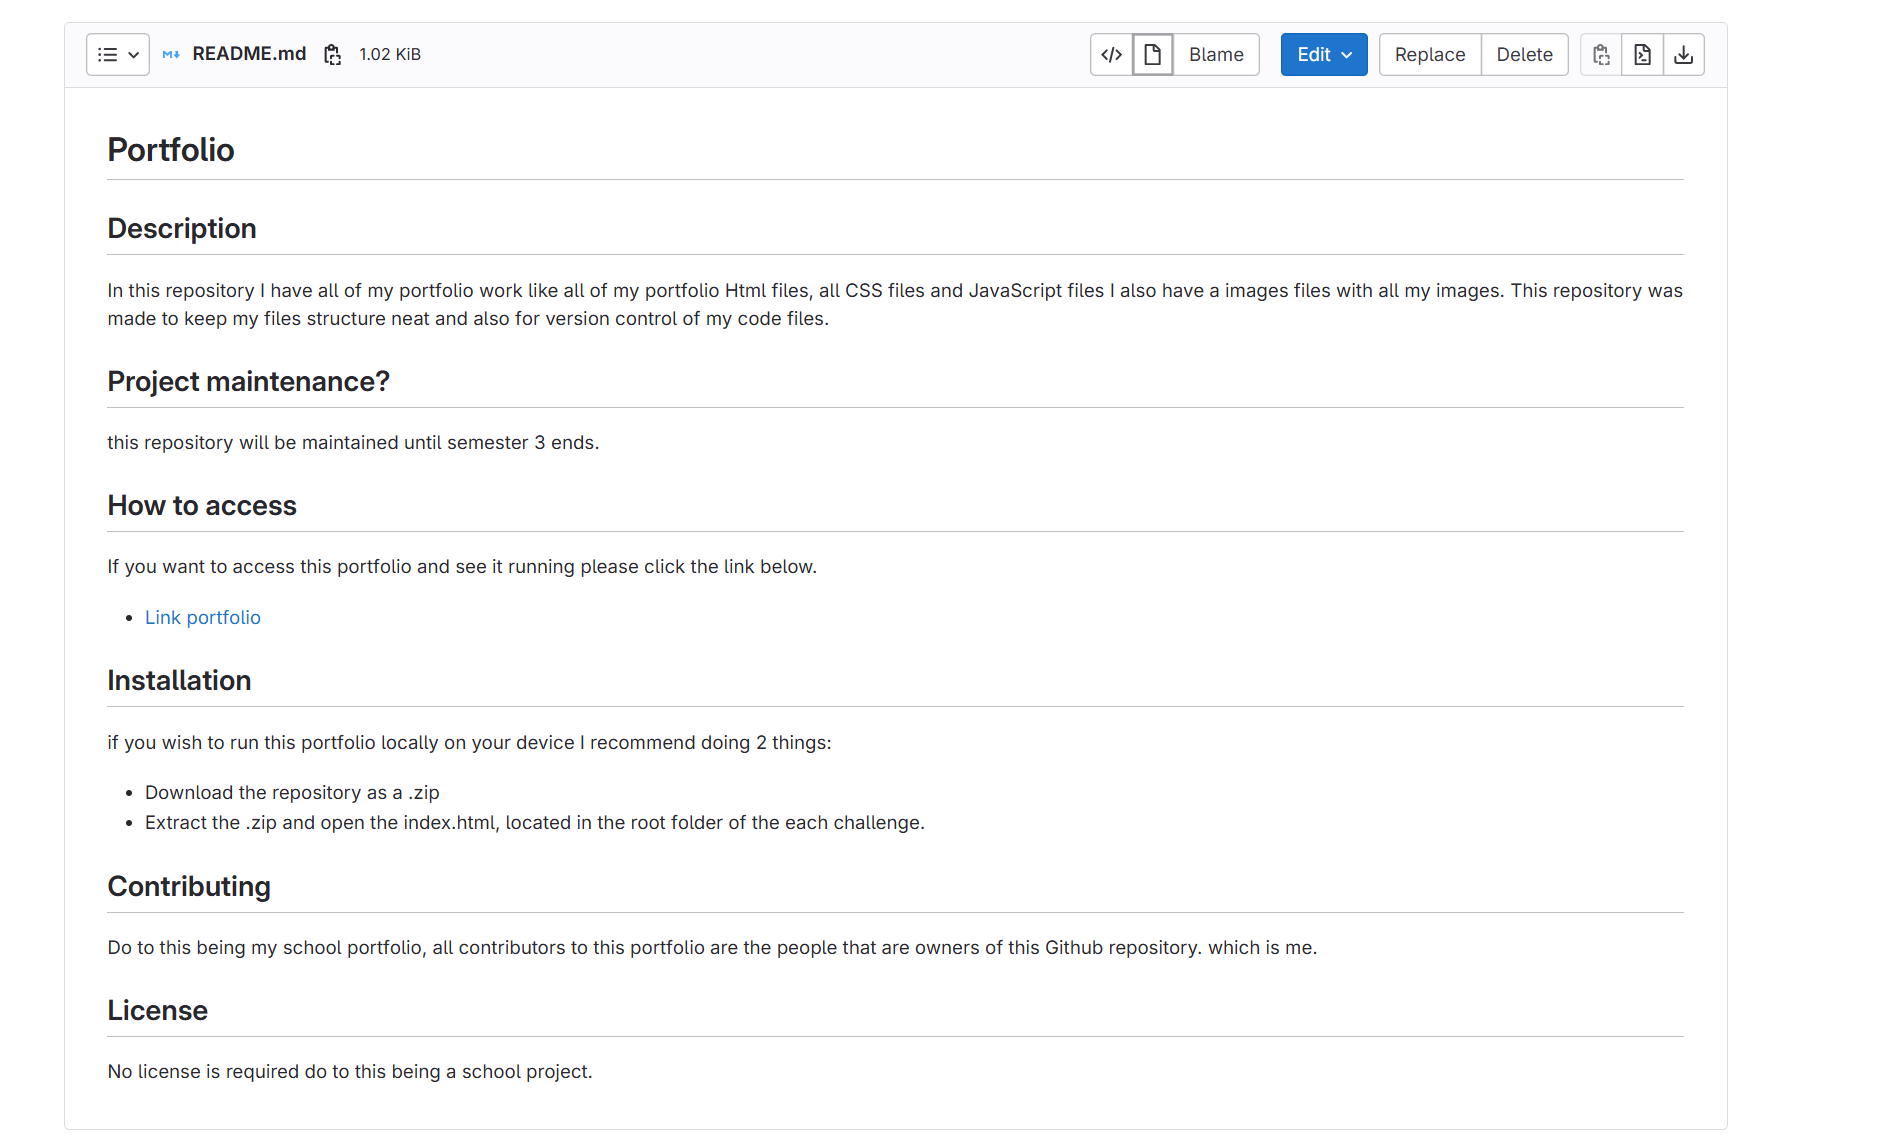
This proof is the comprehensive README.md file that sits at the root of my portfolio website's Git repository. It serves as the primary introduction and guide to the code base. This document is essentially the professional standard for introducing a software project, giving anyone who views the repository all the essential information they need right away.
GOAL
My goal was to treat my personal project as if it were a real, potentially shared project that needed to be easily understood and accessed by others. I wanted to create professional documentation that makes the project transferable and clearly understandable. This is about building the professional habit of creating comprehensive documentation now, so I'm prepared to do it effectively when I join a development team.
REFLECTION
Creating this detailed README forced me to think about my project from the viewpoint of an outside developer. It made me structure my thoughts about the project's setup and future lifespan. I realized that good documentation isn't just about making things easy for others; it also helps me clarify the project's scope and goals for myself. It’s a key part of properly finishing a product.
WHY PROOF BELONGS
The README directly addresses the requirement to "create professional documentation". By including information on how to run the portfolio locally and setting a clear maintenance end date, I am ensuring the project is easily transferable to another user or context. This also demonstrates I can communicate the project status and structure clearly to relevant stakeholders, which in this case is anyone who views the repository.
ACTION
In developing this document, I made sure to include several specific pieces of information written in paragraph form: I provided a clear description of the git repository's contents and set the project's maintenance timeline, stating it will be maintained until the end of Semester 3. I also included a specific section detailing the steps necessary to run the portfolio locally on a device, listed the current contributors, and added details on how a user can access the live portfolio. In the image below you can see the ReadMe file.
DESCRIPTION
This proof covers how I handled communication with the client for this project. Instead of just sending an email here and there, we set up a robust system using a few different tools. We used Teams for official file sharing and major updates, WhatsApp for quick questions, and we had regular online meetings every week. Basically, the goal was to make sure the client was always in the loop and never had to chase me for an update.
GOAL
My main goal was pretty simple: keep the client happy and the project moving forward by being reliable and transparent. I wanted to be the one reaching out first—telling them when I finished something, when I uploaded files, or when I needed something from them. I wanted to establish a clear, professional way of communicating so they felt fully informed about the design process and could give feedback right away.
REFLECTION
I really liked how available and professional the client was. Being able to message them quickly during school hours made things way faster and prevented confusion. It was a great lesson in professional boundaries and responsiveness. This experience totally raised the bar for me; now I know exactly how I want to handle communication with any clients or stakeholders I work with in the future. It showed me that good communication isn't just a nice-to-have, it's essential for a successful project.
WHY PROOF BELONGS
This demonstrates the ability to communicate design decisions and recommendations to relevant stakeholders. I was constantly communicating where the project was, what I needed, and what the next steps were through various professional channels. By being proactive and detailing my work in the meetings, I made sure the client was a well-informed stakeholder, and by uploading files to Teams, I made the process transparent and ready for any handovers, which makes the whole production process transferable.
ACTION
I was very active across all the communication channels. Whenever I finished a task or uploaded something to the project folders, I sent a message to let the client know. If I needed clarification or a resource to continue working, I immediately messaged them so there was no downtime. In our scheduled online meetings, I always gave a clear, structured update on what I had achieved, what I still needed to do, what I was missing, or sometimes what I simply couldn't deliver and why. Crucially, I consistently uploaded all my work files into Teams so the client could access them and see the progress for themselves whenever they wanted.

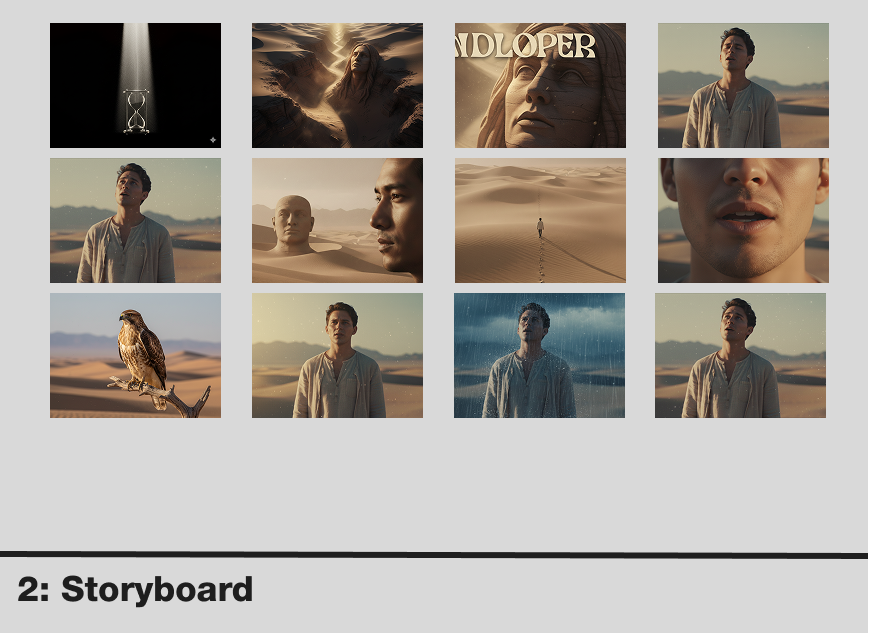
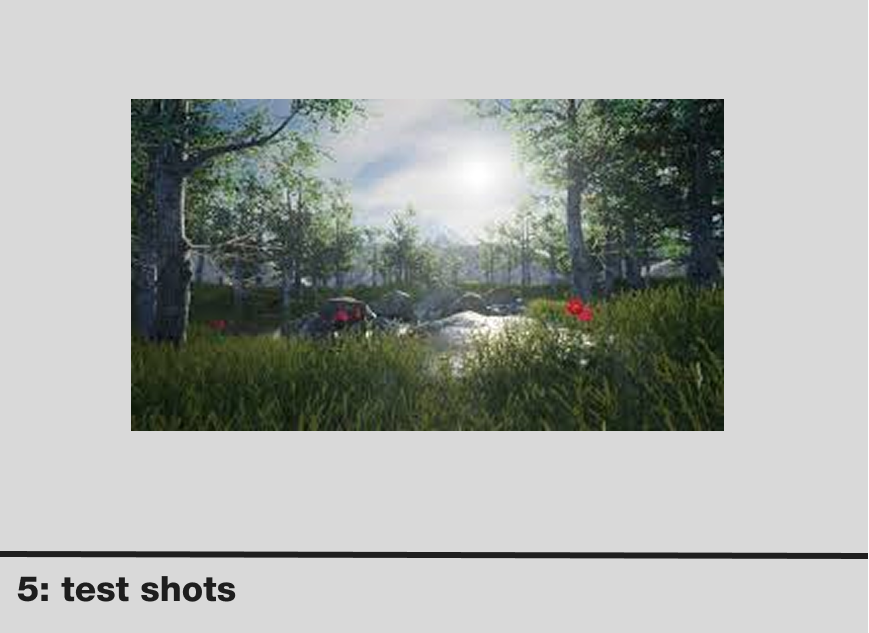
DESCRIPTION
This proof is the clear, documented structural plan for the project's final showcase video. Even though it's a video edit, treating its structure like this is a key piece of professional documentation. I broke the video down into five distinct scenes, ensuring the final product covered all the necessary elements of the project in a logical order, making the video easy to follow for the assessors.
GOAL
The main goal was to use this structural plan to communicate the project's value and workflow effectively in the final video. I wanted to make sure that the assessors, or any other stakeholder, could clearly follow our process. By defining the five scenes especially the parts showing our technical work and lab time we guaranteed that all the important project elements were presented clearly and logically in the final edit.
REFLECTION
Mapping out the final edit structure like this was really smart. It forced us to think about the audience—the assessors—and what they needed to see. It showed me that even in video production, proper documentation of the final structure is vital. It helped keep the editing focused and prevented the final video from just jumping randomly between clips. It was a great lesson in organizing and presenting a final product professionally.
WHY PROOF BELONGS
This structure serves as "professional documentation" of the final product's design. It directly helps "communicate design decisions" (specifically the narrative and evidence structure of the video) to "relevant stakeholders" (the assessors). By having this defined structure, the video's presentation becomes highly organized and transferable, allowing anyone to quickly understand the project's key components and workflow just by following the scene breakdown.
ACTION
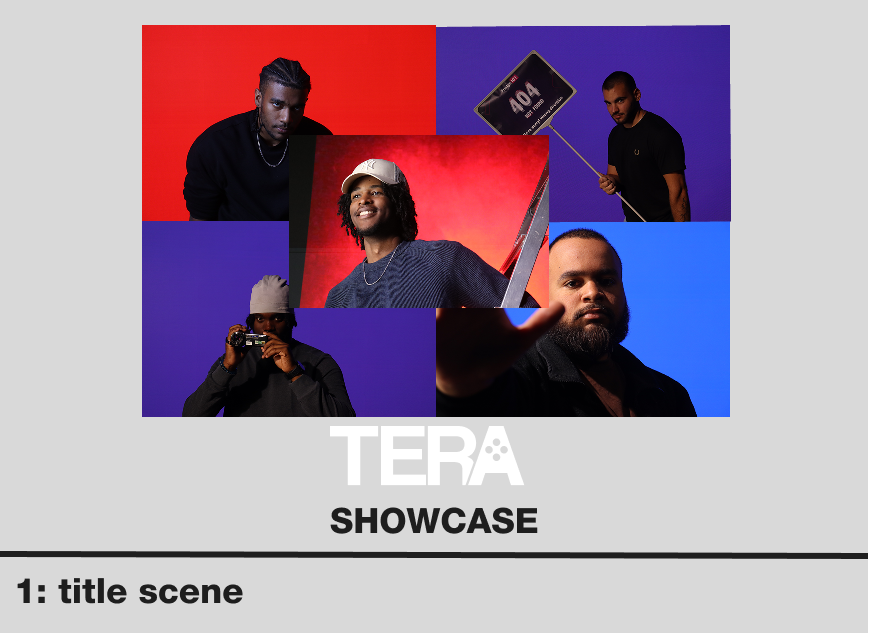
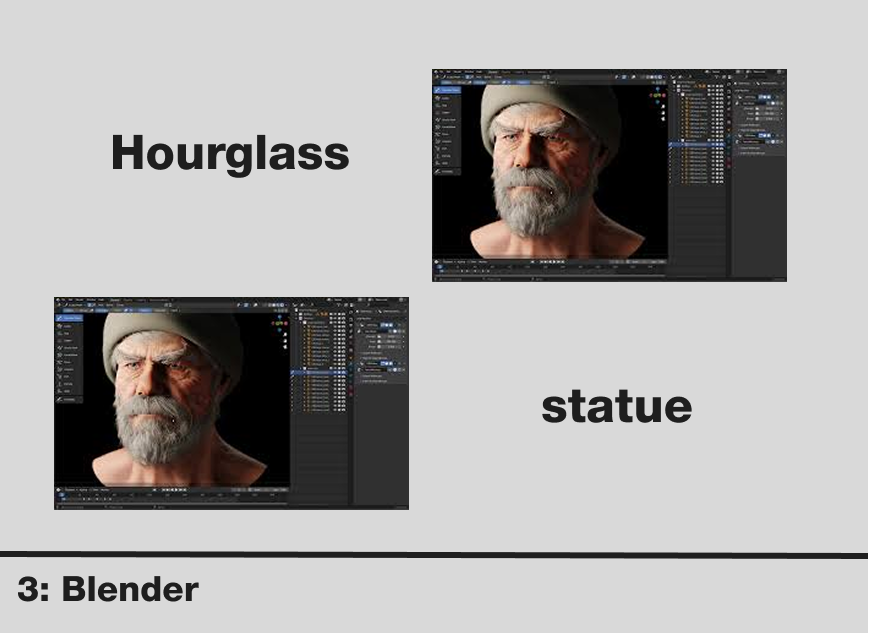
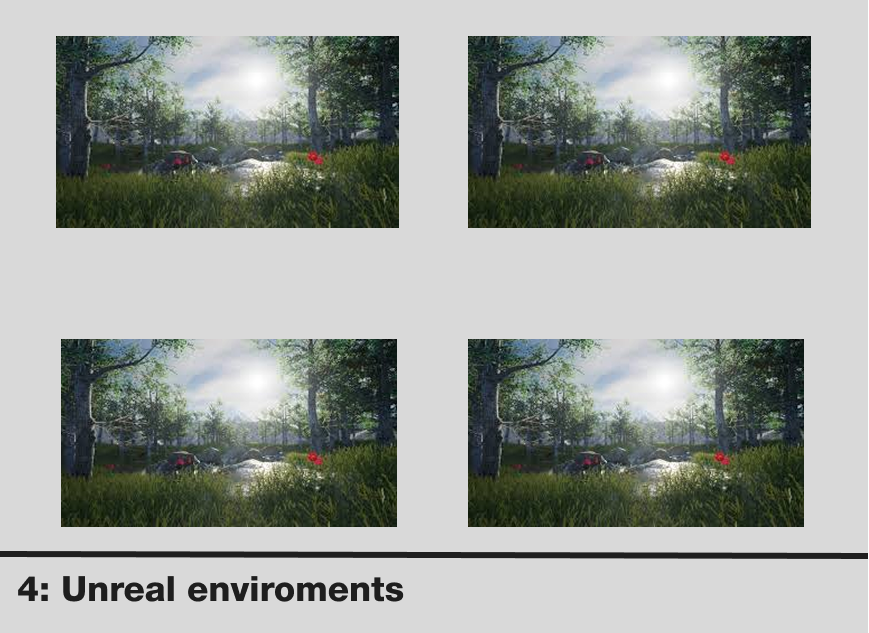
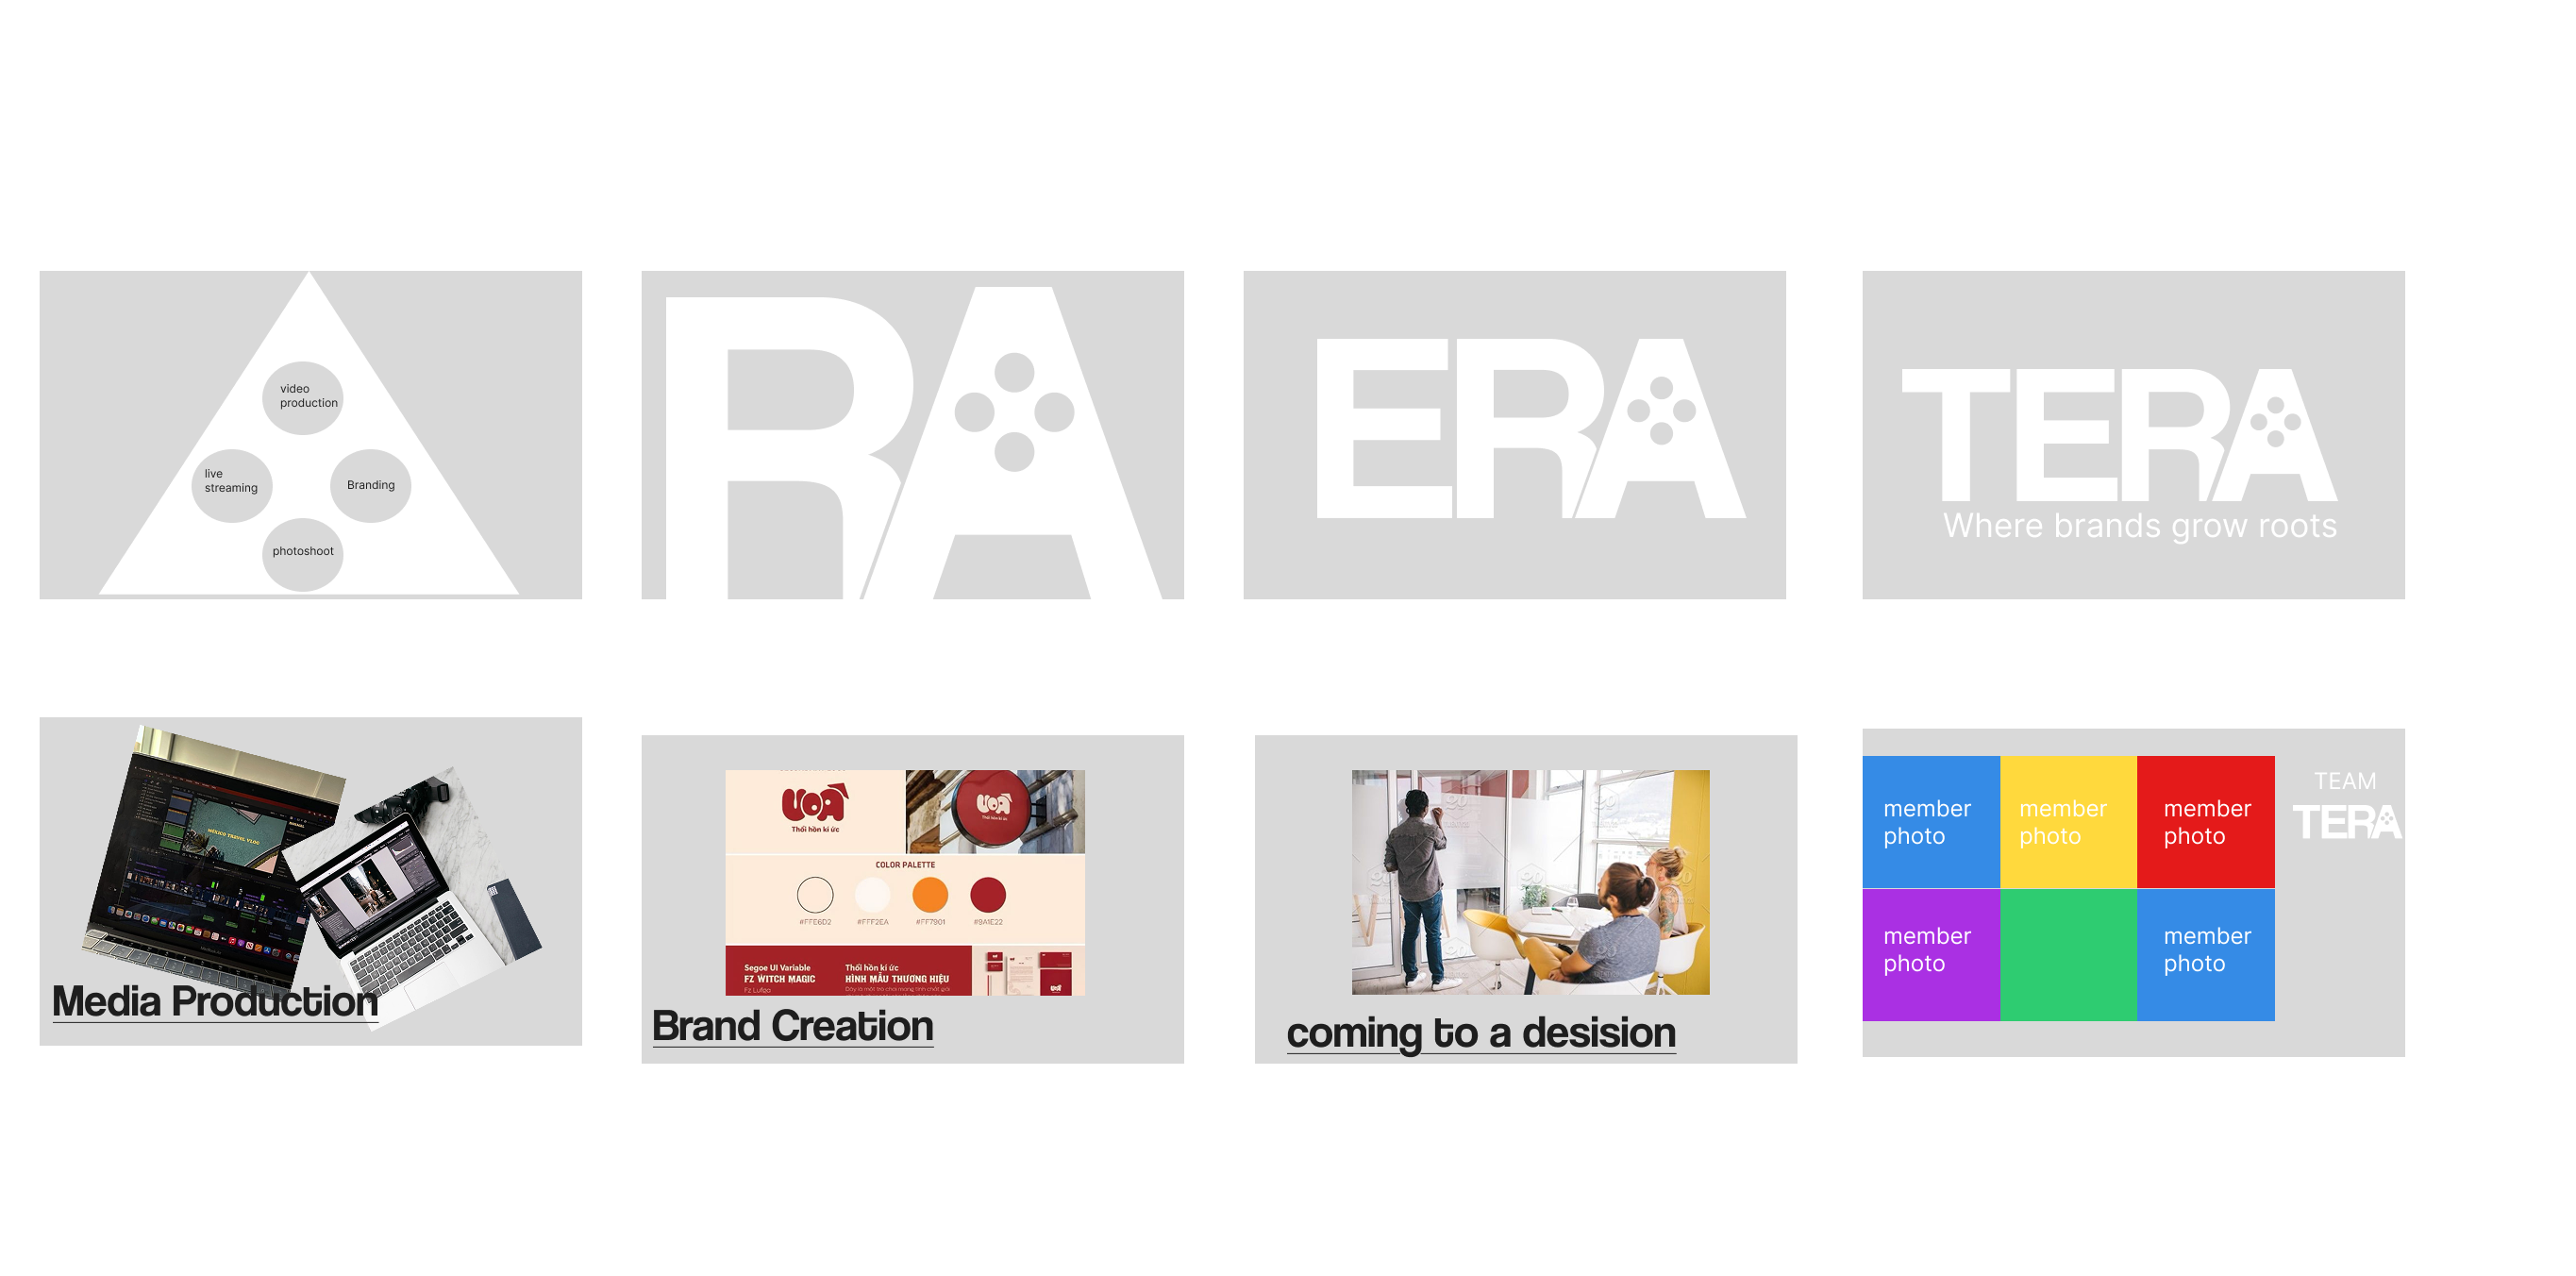
started by clearly structuring the video's concept into a five-scene format to organize the edit. The content for each scene was clearly defined: the first scene was an introduction to the team, followed by a dedicated section showing the actual storyboard as evidence of our initial planning. Then, we included a scene detailing our technical work in Unreal Engine, followed by a scene showing us physically working in the media lab. The final scene was dedicated to showcasing our successful test shots from the lab, proving our results. If you wantto see the storyboard the images are below and if you wish to see the video it is also below.